C'è un tipo specifico di ansia che si prova quando si collega un'auto elettrica e... non succede nulla. Nessun clic, nessun ronzio, solo una luce rossa lampeggiante o uno schermo morto. Che si tratti di un'unità domestica installata in un garage o di una stazione pubblica in un parcheggio piovoso, l'affidabilità è tutto.
Test di un caricabatterie per veicoli elettrici-(tecnicamente noto come EVSE (Electric Vehicle Supply Equipment)) non è così semplice come testare una normale presa a muro. Non basta inserire un multimetro nella spina per vedere se c'è tensione. Infatti, se c'è tensione sui pin quando non è collegato a un'automobile, il caricabatterie è rotto e pericoloso.
Il collaudo corretto richiede un mix di controlli visivi, strumenti di simulazione specializzati e un po' di pazienza per garantire che la "stretta di mano" tra la scatola e la vettura avvenga davvero.

L'ispezione visiva iniziale del caricabatterie per veicoli elettrici
Prima di tirare fuori qualsiasi strumento, il test più efficace è spesso solo un paio di occhi. Queste unità hanno una vita difficile. Cadono, vengono investite e sono esposte alle intemperie.
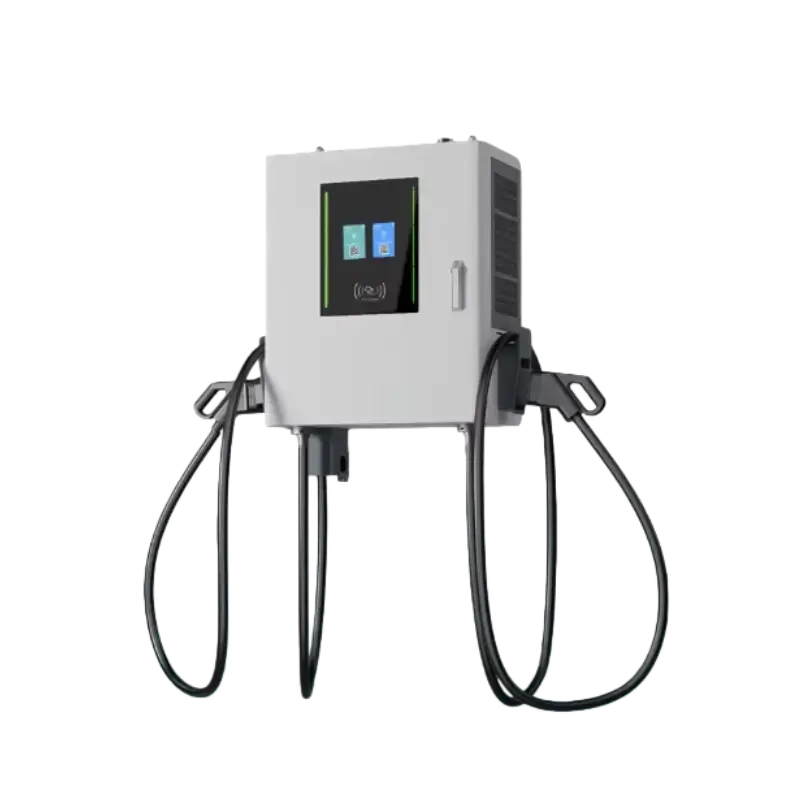
Un'ispezione approfondita inizia dal cavo. Deve essere liscio. Se ci sono tagli, rame esposto o se l'isolante sembra masticato, il test è finito: è fallito. Il connettore (l'impugnatura) è un altro punto debole. I pin all'interno devono essere dritti e puliti. Se si notano segni di bruciatura o fuliggine nera, significa che si è verificato un arco elettrico, ovvero che il contatto si è allentato durante una carica precedente.
È inoltre opportuno afferrare l'unità e scuoterla leggermente. Se il caricabatterie per veicoli elettrici è montato a parete, non dovrebbe oscillare. Le viti di montaggio allentate possono provocare vibrazioni interne, che finiscono per far vibrare i fili all'interno dell'involucro.
Utilizzo di un simulatore di EVSE per lo "Handshake"
Qui la questione si fa tecnica. Come già detto, un caricabatterie per veicoli elettrici è un interruttore intelligente. Non rilascia l'elettricità ad alta tensione finché non è sicuro che l'auto sia collegata e pronta.
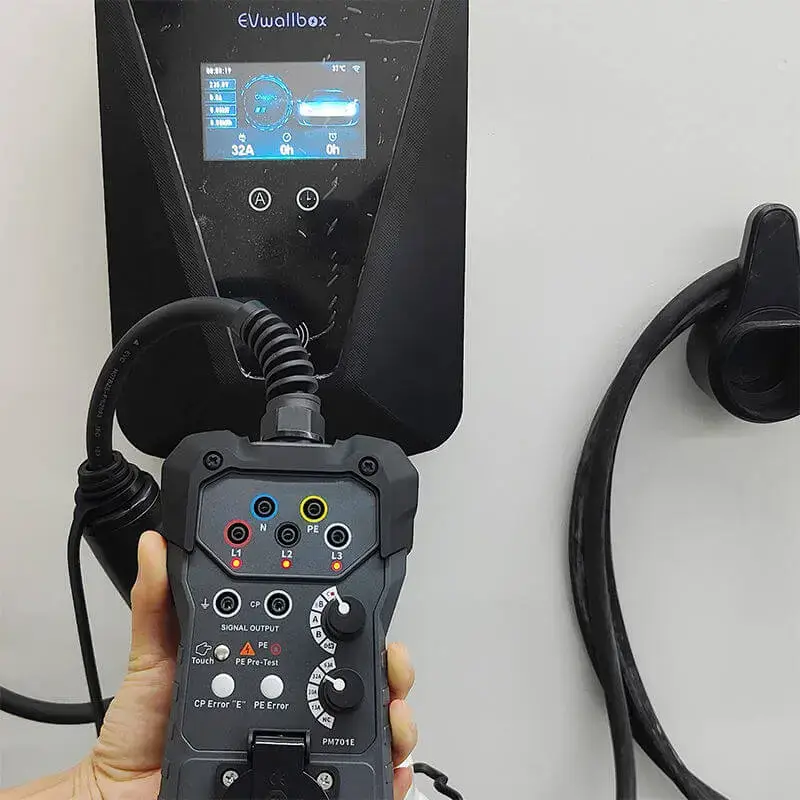
Per testare questo aspetto senza utilizzare un'auto vera e propria, i tecnici utilizzano un simulatore/adattatore EVSE. Questo dispositivo riproduce l'impronta elettrica di un veicolo.
- Collegare il simulatore: Si collega alla pistola di ricarica proprio come un'automobile.
- Simulare la connessione (dallo stato A allo stato B): Ruotando una manopola si comunica al caricabatterie "Ehi, c'è un'auto collegata". Il caricabatterie dovrebbe riconoscerlo, ma non inviare ancora energia.
- Simulare la carica (Stato C): Si gira di nuovo la manopola per richiedere l'alimentazione. Questo è il momento della verità. Si dovrebbe sentire un forte e distinto "CLUNK" dall'interno dell'unità. È il contattore che si chiude, inviando 240 V (o più) alla spina.
Se non si sente quel "clunk" o se il simulatore non si accende indicando la presenza di tensione, il controllore interno o il segnale di comunicazione del pilota sono morti.
Test delle funzioni di sicurezza e dei guasti a terra
La sicurezza è il motivo per cui esistono queste scatole. Se fossero solo delle prolunghe, non ne avremmo bisogno. Una parte fondamentale della routine di manutenzione è garantire che il caricabatterie per veicoli elettrici possa salvare una vita se qualcosa va storto.
La caratteristica più importante è la protezione GFCI (Ground Fault Circuit Interrupter). Questo è il punto in cui un Tester per caricabatterie EV La maggior parte dei tester per caricabatterie EV è essenziale, in quanto include un pulsante dedicato a questa funzione specifica. Quando il sistema è sotto tensione e "in carica", premendo il pulsante di test GFCI sul tester per caricabatterie EV si crea una piccola perdita controllata verso terra.
La reazione dovrebbe essere immediata. Il contattore dovrebbe aprirsi "di botto", interrompendo immediatamente l'alimentazione, e l'unità dovrebbe probabilmente far lampeggiare una spia rossa di errore. Se il caricabatterie continua a ronzare mentre il guasto viene simulato dal tester per caricabatterie EV, rappresenta un grave rischio per la sicurezza e deve essere immediatamente smantellato.
Interpretazione dei segnali e test di carico
Anche se le luci si accendono, il caricabatterie eroga effettivamente la giusta quantità di energia? A casa, questo potrebbe non avere molta importanza, ma per un caricabatterie per veicoli elettrici commerciale, le aziende devono sapere che stanno ottenendo ciò per cui pagano.
Una prova di carico consiste nel far funzionare il caricabatterie per un certo periodo (di solito 15-30 minuti) e nell'utilizzare una termocamera per individuare i punti caldi. Un calore eccessivo in corrispondenza dell'interruttore, della scatola di giunzione o della maniglia indica solitamente la presenza di collegamenti allentati.
Ecco una guida rapida a ciò che il caricabatterie potrebbe cercare di dirvi durante un test:
| Indicatore / Sintomo | Stato probabile | Azione richiesta |
|---|---|---|
| Verde fisso | Pronto / Standby | Collegare il simulatore/veicolo. |
| Blu/verde lampeggiante | Carica in corso | Monitorare la presenza di calore o rumore. |
| Rosso solido | Guasto del sistema | Ripristinare l'interruttore; ispezionare il guasto interno. |
| Rosso lampeggiante | Guasto a terra o auto-ritorno | Controllare che il cavo non sia danneggiato; testare il GFCI. |
| Nessuna luce | Nessuna potenza | Controllare l'interruttore del pannello di servizio principale. |
L'importanza del segnale "pilota
Nel connettore è presente un pin specifico chiamato Control Pilot (CP). Si tratta della linea di comunicazione. Utilizza un segnale PWM (Pulse Width Modulation), in pratica un'onda quadra tremolante, per indicare alla macchina la quantità di corrente disponibile.
I test avanzati prevedono il collegamento di un oscilloscopio (o di un multimetro di fascia alta con impostazione del ciclo di lavoro) a questo pin. Se il caricabatterie per veicoli elettrici ha una potenza nominale di 40 Ampere, ma il segnale pilota dice all'auto "accetta solo 10 Ampere", la velocità di ricarica sarà dolorosamente lenta. Si tratta di una modalità di guasto comune nelle unità più vecchie, in cui l'elettronica interna si degrada. Funziona, ma impiega tre volte più tempo del dovuto. Per saperne di più sul caricabatterie per veicoli elettrici, leggere I caricabatterie EV devono essere testati.
FAQ
Posso utilizzare la mia auto per testare il caricabatterie per veicoli elettrici?
È possibile effettuare un controllo di base del funzionamento (si carica?), ma non si tratta di un test completo. L'auto non vi dirà se la protezione contro i guasti a terra di sicurezza funziona, né potrà simulare in modo sicuro condizioni di errore specifiche senza rischiare di danneggiare il computer di bordo del veicolo.
Con quale frequenza deve essere testato un caricabatterie per veicoli elettrici commerciali?
Le raccomandazioni variano, ma una buona regola per le unità pubbliche o commerciali è ogni 6-12 mesi. I cavi e i connettori si usurano fisicamente molto più rapidamente dell'elettronica interna, quindi è meglio effettuare controlli visivi frequenti.
Perché il caricabatterie per veicoli elettrici fa clic ma non carica?
Il "clic" è il tentativo di chiusura del relè. Se fa clic e poi si spegne immediatamente (o mostra un errore), probabilmente non ha superato il test di autodiagnosi. Ciò potrebbe significare che rileva un guasto a terra, un cortocircuito o che la tensione della rete è instabile.